Categories
Technology

Breaking a Linux Software RAID 1 for Import using VMware Converter

I rarely post super-geeky stuff on here, but since I couldn’t find any good instructions to do this important and critical activity on the Internet, and my co-workers had to piece together a set of steps that worked for us, I wanted to share what we learned, hoping to save the next person all of the work.

Linux has supported the idea of software RAID, particularly RAID 1 (or disk mirroring) for a long time. Disk mirroring is a great way to gain some insurance against a single disk failure bringing down a critical system, as everything rewritten to one disk is also written to the other disk. Many servers use hardware RAID, which mirrors the disks at a lower level than the operating system can see, making it easier to gain this redundancy. However, hardware RAID has always been more expensive than software RAID, and so there are quite a few servers out there using software RAID to protect their data.

This week, we had one of our last physical (non-virtual) server (RedHat Linux 4 AS) that needed to be virtualized. Due to the size of the data stored on that system and how it uses an external disk array, it was important that we virtualize it in place, using excellent VMware’s Converter Standalone to import the running machine, so that there was no downtime while importing the data. However, the Converter Standalone will not import Linux systems using software RAID, due to problems accessing the underlying data structures of the disk through the metadevices presented by the software RAID. (You know you are having this problem when the Converter complains about not being able to access the /boot partition.) The best solution was to break the mirrored software RAID and boot the system off of one disk, so that all of the necessary partitions could be imported and the system could be virtualized.

Unfortunately, as important and seemingly common as breaking a mirrored software RAID is in Linux, I couldn’t find any good, comprehensive, working instructions on how to do it, and breaking a software RAID is a tricky business. It is very, very easy to end up with a non-booting system and no easy way to repair it. So, to help out the next person that runs into it, I’m posting the steps that we did to break the mirrored software RAID and set the system to boot off of only one disk, so that VMware’s Converter Standalone would work on it.

First, get an idea of what you are dealing with. Logged in as root, inspect the system:

[root@cr2 cr]# df -h
Filesystem Size Used Avail Use% Mounted on
/dev/md2 456G 45G 389G 11% /
/dev/md0 487M 35M 427M 8% /boot
none 4.0G 0 4.0G 0% /dev/shm
/dev/sda1 2.0T 560G 1.4T 30% /archive
[root@cr2 cr]# more /etc/fstab
# This file is edited by fstab-sync - see 'man fstab-sync' for details
/dev/md2 / ext3 defaults 1 1
/dev/md0 /boot ext3 defaults 1 2
none /dev/pts devpts gid=5,mode=620 0 0
none /dev/shm tmpfs defaults 0 0
none /proc proc defaults 0 0
none /sys sysfs defaults 0 0
/dev/md1 swap swap defaults 0 0
/dev/sda1 /archive ext3 defaults 1 0
/dev/hda /media/cdrecorder auto pamconsole,exec,noauto,managed 0 0
[root@cr2 cr]# more /etc/mtab
/dev/md2 / ext3 rw 0 0
none /proc proc rw 0 0
none /sys sysfs rw 0 0
none /dev/pts devpts rw,gid=5,mode=620 0 0
usbfs /proc/bus/usb usbfs rw 0 0
/dev/md0 /boot ext3 rw 0 0
none /dev/shm tmpfs rw 0 0
/dev/sda1 /archive ext3 rw 0 0
none /proc/sys/fs/binfmt_misc binfmt_misc rw 0 0
sunrpc /var/lib/nfs/rpc_pipefs rpc_pipefs rw 0 0

In this case, we have 3 metadevices (md0 as /boot, md1 as swap, and md2 as root /). You can get further details about your RAID configuration using the mdadm tool, as well as mdstat:

[root@cr2 cr]# cat /proc/mdstat
Personalities : [raid1]
md1 : active raid1 sdc2[1] sdb2[0]
 2200832 blocks [2/2] [UU]
md2 : active raid1 sdc3[1] sdb3[0]
 485668928 blocks [2/2] [UU]
md0 : active raid1 sdc1[1] sdb1[0]
 513984 blocks [2/2] [UU]
unused devices: <none>

You can also run these commands:

cat /proc/mdstat
mdadm --detail /dev/md2     (to inquire about the disk members of the /dev/md2 metadevice)

When you are finally ready to do this, make sure you have a full backup of your system, and then stop all running services, especially any that would possibly write data, such as databases.

Next, we need to use mdadm to set one of the disks (we chose /dev/sdc) to be set as “failed” and removed from the RAID array. To do this, we ran these commands:

mdadm --fail /dev/md2 /dev/sdc3
mdadm --remove /dev/md2 /dev/sdc3
mdadm --zero-superblock /dev/sdc3
mdadm --fail /dev/md1 /dev/sdc2
mdadm --remove /dev/md1 /dev/sdc2
mdadm --zero-superblock /dev/sdc2
mdadm --fail /dev/md0 /dev/sdc1
mdadm --remove /dev/md0 /dev/sdc1
mdadm --zero-superblock /dev/sdc1

At this point, the software RAID still exists, but the /dev/sdc disk has been removed from it. All of the data on /dev/sdc is set as standalone.

Next, we need to modify the partition table on /dev/sdc to change it from software RAID to standard Linux partitions.

fdisk /dev/sdc

Select “p” to change the partition table, then “t” to change the type of partition. Select the partition number from the list. We changed /boot and / to be standard ext3 partitions, which is code 83, and the swap partition was changed to 82. Be sure to select “w” at the end to write all of these changes to the /dev/sdc disk when you are done.

Next, we need to mount the / and /boot partitions of /dev/sdc so that we can change files on that filesystem, so that a reboot on /dev/sdc is possible.

mkdir /mntboot
mkdir /mntroot
mount /dev/sdc3 /mntroot/
mount /dev/sdc1 /mntboot/
vi /mntroot/etc/fstab

Change fstab to so that /dev/sdc partitions will be automounted upon boot, rather than the /dev/md devices. Also, move the mdadm.conf file on /dev/sdc out of the way, so that it cannot be used when booting /dev/sdc.

mv /mntroot/etc/mdadm.conf /mntroot/etc/mdadm.bak

Now, we need to modify grub so that the bootloader will load Linux using /dev/sdc and not the /dev/md device. Notice that I will be doing this on the existing /dev/md running filesystem.

vi /etc/grub.conf

Replace the /dev/md2 (or whatever your root partition is) references with /dev/sdc3 (in our case). Save the file and close it.

Also change /mntroot/boot/grub/grub.conf with the same information.

Next, we need to run mkinitrd to use grub to update the bootloader, so that /dev/sdc will be used on boot. To do this look at the kernel you are booting from in /etc/grub.conf. For us, the mdkinitrd command looked like this:

mkinitrd -f -v /boot/initrd-2.6.9-103.ELsmp.img 2.6.9-103.ELsmp

After you run that, you will the bootloader being reconfigured. When it is complete, you are ready to reboot the server. You should boot up on /dev/sdc and be ready to do the VMware Converter Standalone importer.
Categories
General Technology

The Love Shack Is a Little Old Place

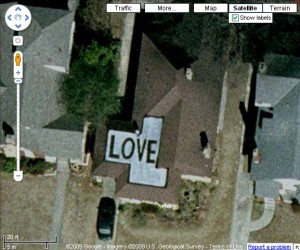
It is now pretty easy to pick out our house from space.

Love Shack

My mom tipped me off to this. The satellite imagery in Google Maps for my neighborhood was updated sometime in the past few weeks. For the longest time, we only had images from 2004, and now, they appear to be updated to early-2007.

Slightly before that time, I had to do some roof repairs on a flat area of my roof. I had a bit of extra tar when I was through, so I put it to use to beam some goodwill to space. I was hoping that the various satellites would pick it up, and now, finally, my favorite mapping site has caught up. Unfortunately (or fortunately), we had our roof redone a year or so after this image was made, so our next roof pic is likely to be more boring.

Click here to check it out on Google Maps

Categories
Technology

How to Install the MBString PHP Extension

Sometimes, I just love working with Red Hat, PHP, and MySQL.

I was setting up a new Linux server today, and I noticed the error in phpMyAdmin, a popular web-based application that uses PHP to allow a user to administer MySQL databases. I’ve been using phpMyAdmin for a long time, and the more recent versions of MySQL have been released with a Unicode character set (UTF-8), which is actually a good thing, since it can handle storing data from many more languages and language sets. However, phpMyAdmin was barking about a problem with my default Apache+PHP setup on the Red Hat Enterprise Linux 4 server:

The mbstring PHP extension was not found and you seem to be using a multibyte charset. Without the mbstring extension phpMyAdmin is unable to split strings correctly and it may result in unexpected results.

I did some research in what was involved to enable the mbstring PHP extension, and it was looking like so much work I was just going to leave it, but finally, I turned up the easy answer: Simply install the php-mbstring package. With an up2date subscription, it is easy:

up2date -i php-mbstring

Finally, bounce Apache, and the error message went away. Wow, easier than I thought…

Categories
General Technology

DEFCON, the Game?

I just discovered a relatively fun, if someone disturbing, computer game that struck a chord in me. Published by Ambrosia Software and developed by Introversion, the game DEFCON has an interesting catchphrase: “Everybody dies.” And they are aren’t kidding.

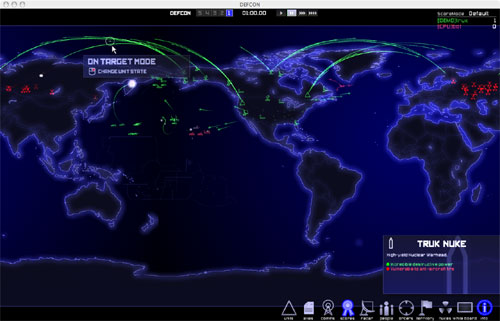
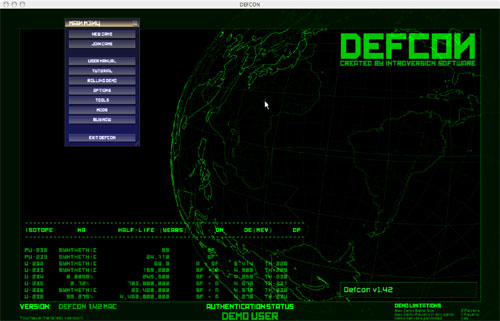
DEFCON Opening Screen

From the splash screen to the beautifully rendered game pieces and playing area, the attention to detail lets you know that you are in for a treat. Basically, the idea behind the game is to simulate the 1983 film WarGames, which features a teenager that accidentally breaks into a top-secret, US military warfare simulation computer looking for a unreleased videogame to play. In the movie, the computer almost causes World War III. However, in DEFCON, World War III happens every game; you can’t stop it.

You begin at DEFCON 5, where you can place your pieces, including air bases, radar stations, missile silos, battleships, aircraft carriers, and nuclear submarines, throughout your territory. Placement, as well as the missions you assign to each piece, are critical to winning the game, as you have less control over movement as the game goes along. As in WarGames, the computer moves you from DEFCON level to DEFCON level, rather swiftly getting to DEFCON 1, which means nuclear weapons are cleared for launch.

DEFCON: It’s On!

If you launch your ICBMs and bombers too early without destroying the defenses of the other side, you will likely not hit the enemy silos, meaning that your cities are vulnerable. However, if you wait too long to launch a crushing blow, most of you missiles will be destroyed in their silos. As in a real Mutually Assured Destruction (MAD) scenario, the game is nothing more than a somewhat complicated game of Chicken, with millions of lives at stake. Well, virtual lives. But this game evokes more than the standard level of engagement when you see your hometown erupt in white light and the casualty number glows below it. “Memphis: 1.1 Million Dead.” Yikes. I guess I shouldn’t have launched my full attack so soon, eh? Sorry about that, pals…

DEFCON brought up memories of hours spent playing a Mac game called Strategic Conquest in the early-1990s. Much like DEFCON, Strategic Conquest didn’t show you what the enemy was doing until it was usually too late to stop it, and both games have nukes. Perhaps the biggest difference between the two, though, is that I always played StratCon with the idea of trying to avoid nukes and wipe out the other sides using conventional weapons. In DEFCON, nukes are the point. The unimaginable actually happens in every game. You can’t win if you don’t nuke. And if you don’t nuke, you’ll get nuked. Everybody dies, indeed.

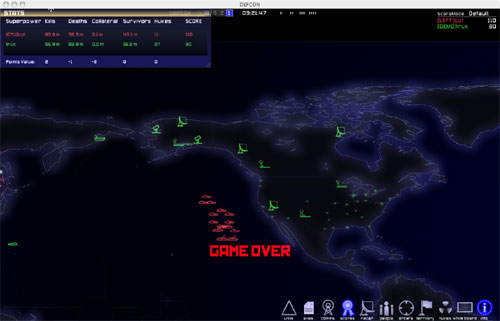
DEFCON: Game Over

DEFCON has a limited demo mode that will let you play the full game but only with non-human players or as an observer of other games happening simultaneously on the Internet. Unlocking the full game is only $25, but you don’t need to buy it to really enjoy some human vs. computer action, which is really more in the spirit of WarGames.

Perhaps the only way to win at DEFCON, as was pointed out by the computer in WarGames, “is not to play.” But with a such an elegant yet simple game that can easily prove addictive, choosing not to play is harder than you think.

Categories
General Technology

Crossroads to Freedom Digital Archive Launch Event

After more than a year-and-a-half of work, the Crossroads to Freedom digital archive launch event took place last night. Kath and I have assisted with the project, overseen by the Office of External Programs at Rhodes College, since 2005, and we enjoyed visiting with many of the people at the launch event that contributed their stories and primary source materials (such as letters, certificates, and awards) to the archive.

Crossroads to Freedom Website

The archive features images, letters, flyers, books, and video interviews related to the civil rights struggle in Memphis and the surrounding area. It utilizes Fedora server software to store and preserve the datastreams and metadata and a custom-built front-end to provide the access and interactivity for visitors. The archive was largely built through the efforts of Rhodes students, who conducted the interviews, put together the TEI files, digitized and processed the video, scanned the images, and entered the descriptive metadata.

Crossroads to Freedom is an attempt to foster a community discussion about the history of civil rights in Memphis and throughout the Mid-South. Several prominent individuals and groups, including Judge Russell Sugarman and the Hill Foundation, contributed significant papers and historical background to help frame the discussion.

The launch event featured inspiring speakers and a wonderful buffet spread (including sugery fudge cubes – yum!), but probably more important, a major part of the program required feedback from the attendees about how to how to increase community participation in the repository. Ideas were submitted by all, and these ideas will be gradually incorporated into strengthening and building upon the Crossroads to Freedom framework.

Congratulations to everyone who worked to make the Crossroads to Freedom launch event a success!

Categories
Technology

Moved to GMail

I guess the future will decide if I have committed “privacy suicide” or made a wise decision, but I’ve moved my main email address to GMail, using Google Apps to host the MX record for the domain. So far, so good, but I keep waiting for the other shoe to drop.

Mazzy Consulting Under Google Apps

My primary reason for switching from my relatively trustworthy and reliable hosting provider DreamHost to Google Apps was spam; DreamHost just couldn’t keep up with the growing spam volumes, and I knew from using GMail with other accounts that it generated few false positives and only missed a spam message every now and then. DreamHost was really struggling, and as spam volume continues to grow at about 10% per month, if 20% of those are sneaking through, pretty soon your Inbox is just full of spam, not to mention that your spam box is loaded to the point where you can’t even try to recover false positives. Google must be providing some advanced blacklisting of spammers, because the amount of spam that even makes it to my spam box has really fallen off. I’m guessing that Google is just refusing connections from known blacklisted IPs to even prevent having to classify the spam as spam.

There have been some benefits that I didn’t intend, however. At first, the lack of folders to organize my email really threw me, but then I realized that I really didn’t need to classify my email in that old way anymore. By tagging the email as I read it and with the advanced searching capability available in GMail, I could more easily find a message than ever before. This is a good thing, as I imported all of my existing email in to GMail, which took several days, as GMail will only import about 200 messages an hour. I tagged all of my imported mail and marked it as read, and I was immediately struck with how much easier it was to perform deep searches of my existing email.

As a side note, if anyone out there is planning to import their existing email to GMail but can’t really figure out the best way to do it, this is what I did. I created a temp IMAP account on DreamHost for another domain that I own. I then uploaded all of my email to that temp IMAP account, putting it in folders. Then, I set GMail to make a POP connection to the temp IMAP account on DreamHost (which also does POP, of course) and started moving email from each IMAP folder into the Inbox on DreamHost temp account, marking the messages as Unread in the IMAP Inbox. I could load as many as 2000 at a time in the Dreamhost IMAP Inbox, and GMail would just grab them 200 at a time. I set it up so that GMail would immediately file them in All Mail rather than the Gmail Inbox upon import, and I simply went into the GMail All Mail area once a day and did some quick tagging, marking them as Read as I went. This method took some time but worked perfectly, and now I have email back to 1998 in my All Mail, with more than 7000 Gmail “conversations” represented. (Each “conversation” in GMail can be comprised of many different email messages related to a particular exchange between two or more people.)

That brings me to another big plus in GMail: I can instantly see everything related to a particular “conversation” in one list. A lot of people don’t quote the email they are replying to, and with GMail conversations, you can still see what you wrote them on the same page as what they are saying about it. Very, very useful.

There are lots of other good reasons to move to GMail and Google Apps if you have your own domain name. The ability to chat using your own domain’s email addresses is a big one, as is the ability to share a common calendar with co-workers and exchange documents. Google Docs and Spreadsheet are in an early form right now, but they are already useful for simple tasks.

Of course, I’m aware that Google has all of my old email data, but I also realize that, unless I can make use of these old messages, why even hold onto them. I don’t necessarily believe that Google can resist being “evil” forever, but for now, email is a pleasure again rather than a chore. And that is good enough for me, for now.